Steps for Installation

The instructions below will guide you through the installation of FarmBooks Accounting Software.
Before You Begin - choose to run as a Trial or Register
When installing FarmBooks for the first time, users can choose to run the program on a trial basis using the existing demo database or enter their Registration Number to create a new database.
Registered users have already purchased a FarmBooks Registration Number and may create a new farm database to customize. Users planning to run the product as a trial will need to use the sample demo farm database in order to use the product.

Step 1:
You should have received an email containing a secure link to download FarmBooks. Please download the file and run the setup to install the program.
Step 2:
After the program is installed look for the FarmBooks icon on your Desktop. Double-click to open.
![]()
Step 3:
With FarmBooks installed on your system, you now have two options:
Steps to Run FarmBooks Free Trial
1. After double-clicking on the FarmBooks icon on your desktop, FarmBooks will load. Once the program is fully loaded, click on File: Open Farm.
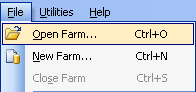
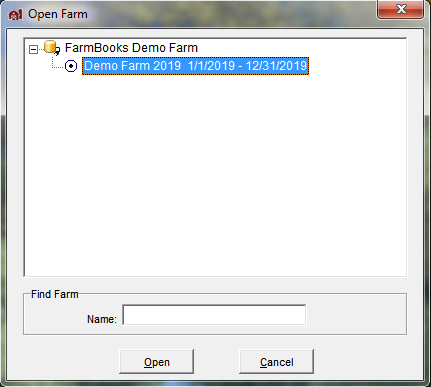
2. Click the + sign next to FarmBooks Demo Farm and then the radio button next to the calendar year. Once completed, click Open.
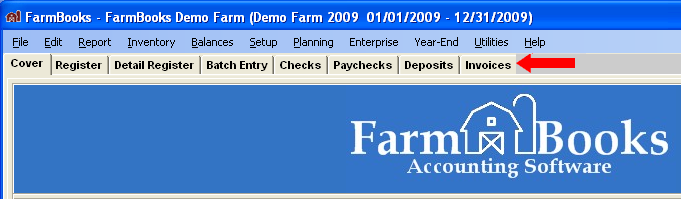
3. Note that now there are tabs for you to view and manage the demo farm.
4. You now have a fully functioning version of FarmBooks to use. You have no obligation to pay, but after you enter 30 transactions you will need to purchase a FarmBooks Registration Key to create a new database for your farm data.
Steps to Register FarmBooks and Create Your First Farm
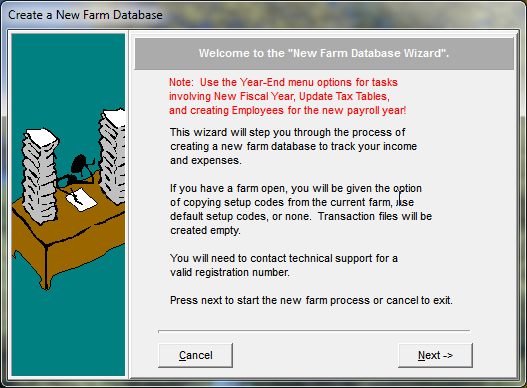
1. After double-clicking on the FarmBooks icon on your desktop, FarmBooks will load. Once the program is fully loaded, click on File: New Farm.
2. The New Farm Wizard will load – click Next.
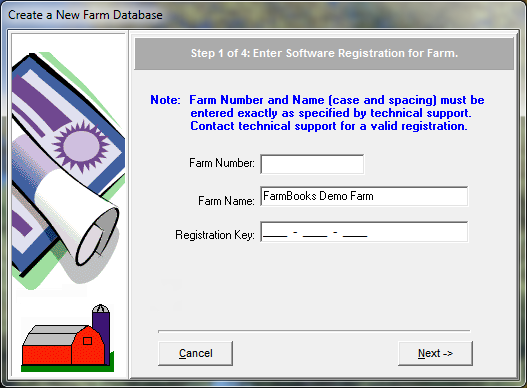
3. Enter the Farm Number, your Farm Name and your Registration Key and then click Next.
Note: Your Farm Number and Farm Number are provided by Sanders Software in your purchase materials.
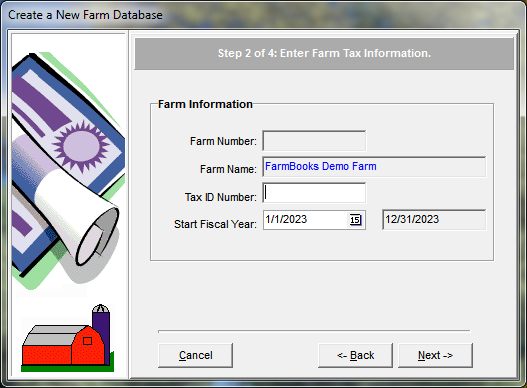
4. Enter your Tax ID number (if known) and your Fiscal Year Start date (generally your fiscal period is the same as the calendar year) and then click Next.
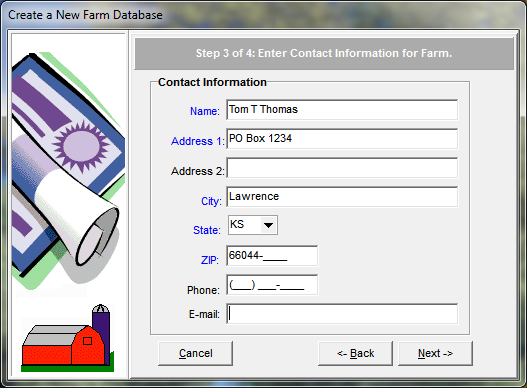
5. Enter your contact information and click Next.
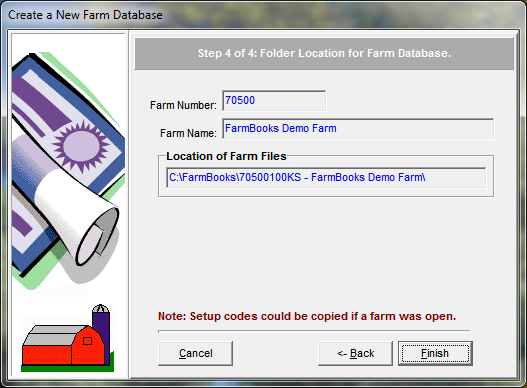
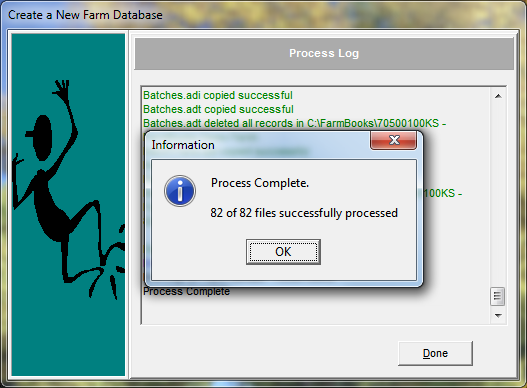
6. Click Finish and FarmBooks will create your farm (this will create a database as a subfolder to FarmBooks).
7. Once completed, click OK.
8. Now open your farm by clicking File: Open Farm.
9. Click the + sign next to your farm, then the radio button next to the calendar year and then click Open.
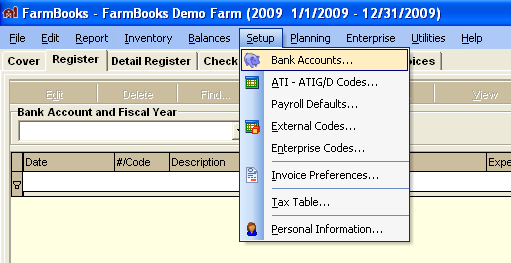
10. The final step is to define a bank account to allow you to start entering your data. Click on Setup: Bank Accounts.
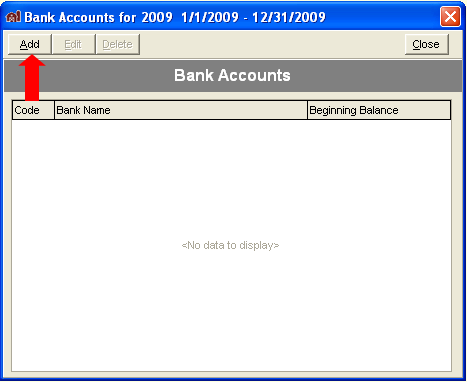
11. When the Bank Accounts window opens, click Add.
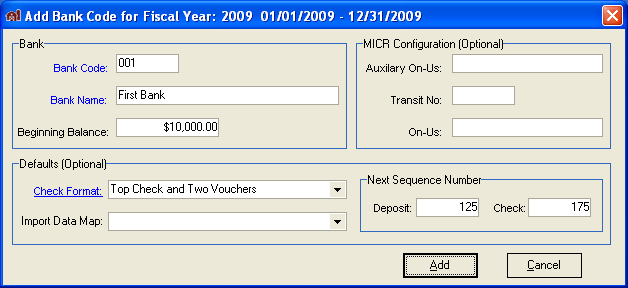
12. Enter the Bank Code, Bank Name and Beginning Balance and click Add. (The Bank Code is a five character code and is something that you determine. If you don’t know the Bank Balance at this time, you can come back and update this information at a later date).
13. Once completed, you can close out of the Bank Accounts window and begin entering transactions into FarmBooks.